Channels & platforms
Live chat
Live chat: the chat window on your store's website, where the agent answers your visitors.
Open the page in the dashboardHow chat on your site works
Live chat is a small window in the corner of your store where a visitor types and the agent replies — then your team, when needed. What visitors write lands in the inbox with every other channel.
Everything you change here (look, texts, questions) shows in the “Live preview” at once, and reaches your store after you save, with no code to paste again.
Chat shows to your visitors when three things are true: the “Chat on your site” switch is on, the store is published (“Publish now” on the home page), and the code is on your site.
Read the page
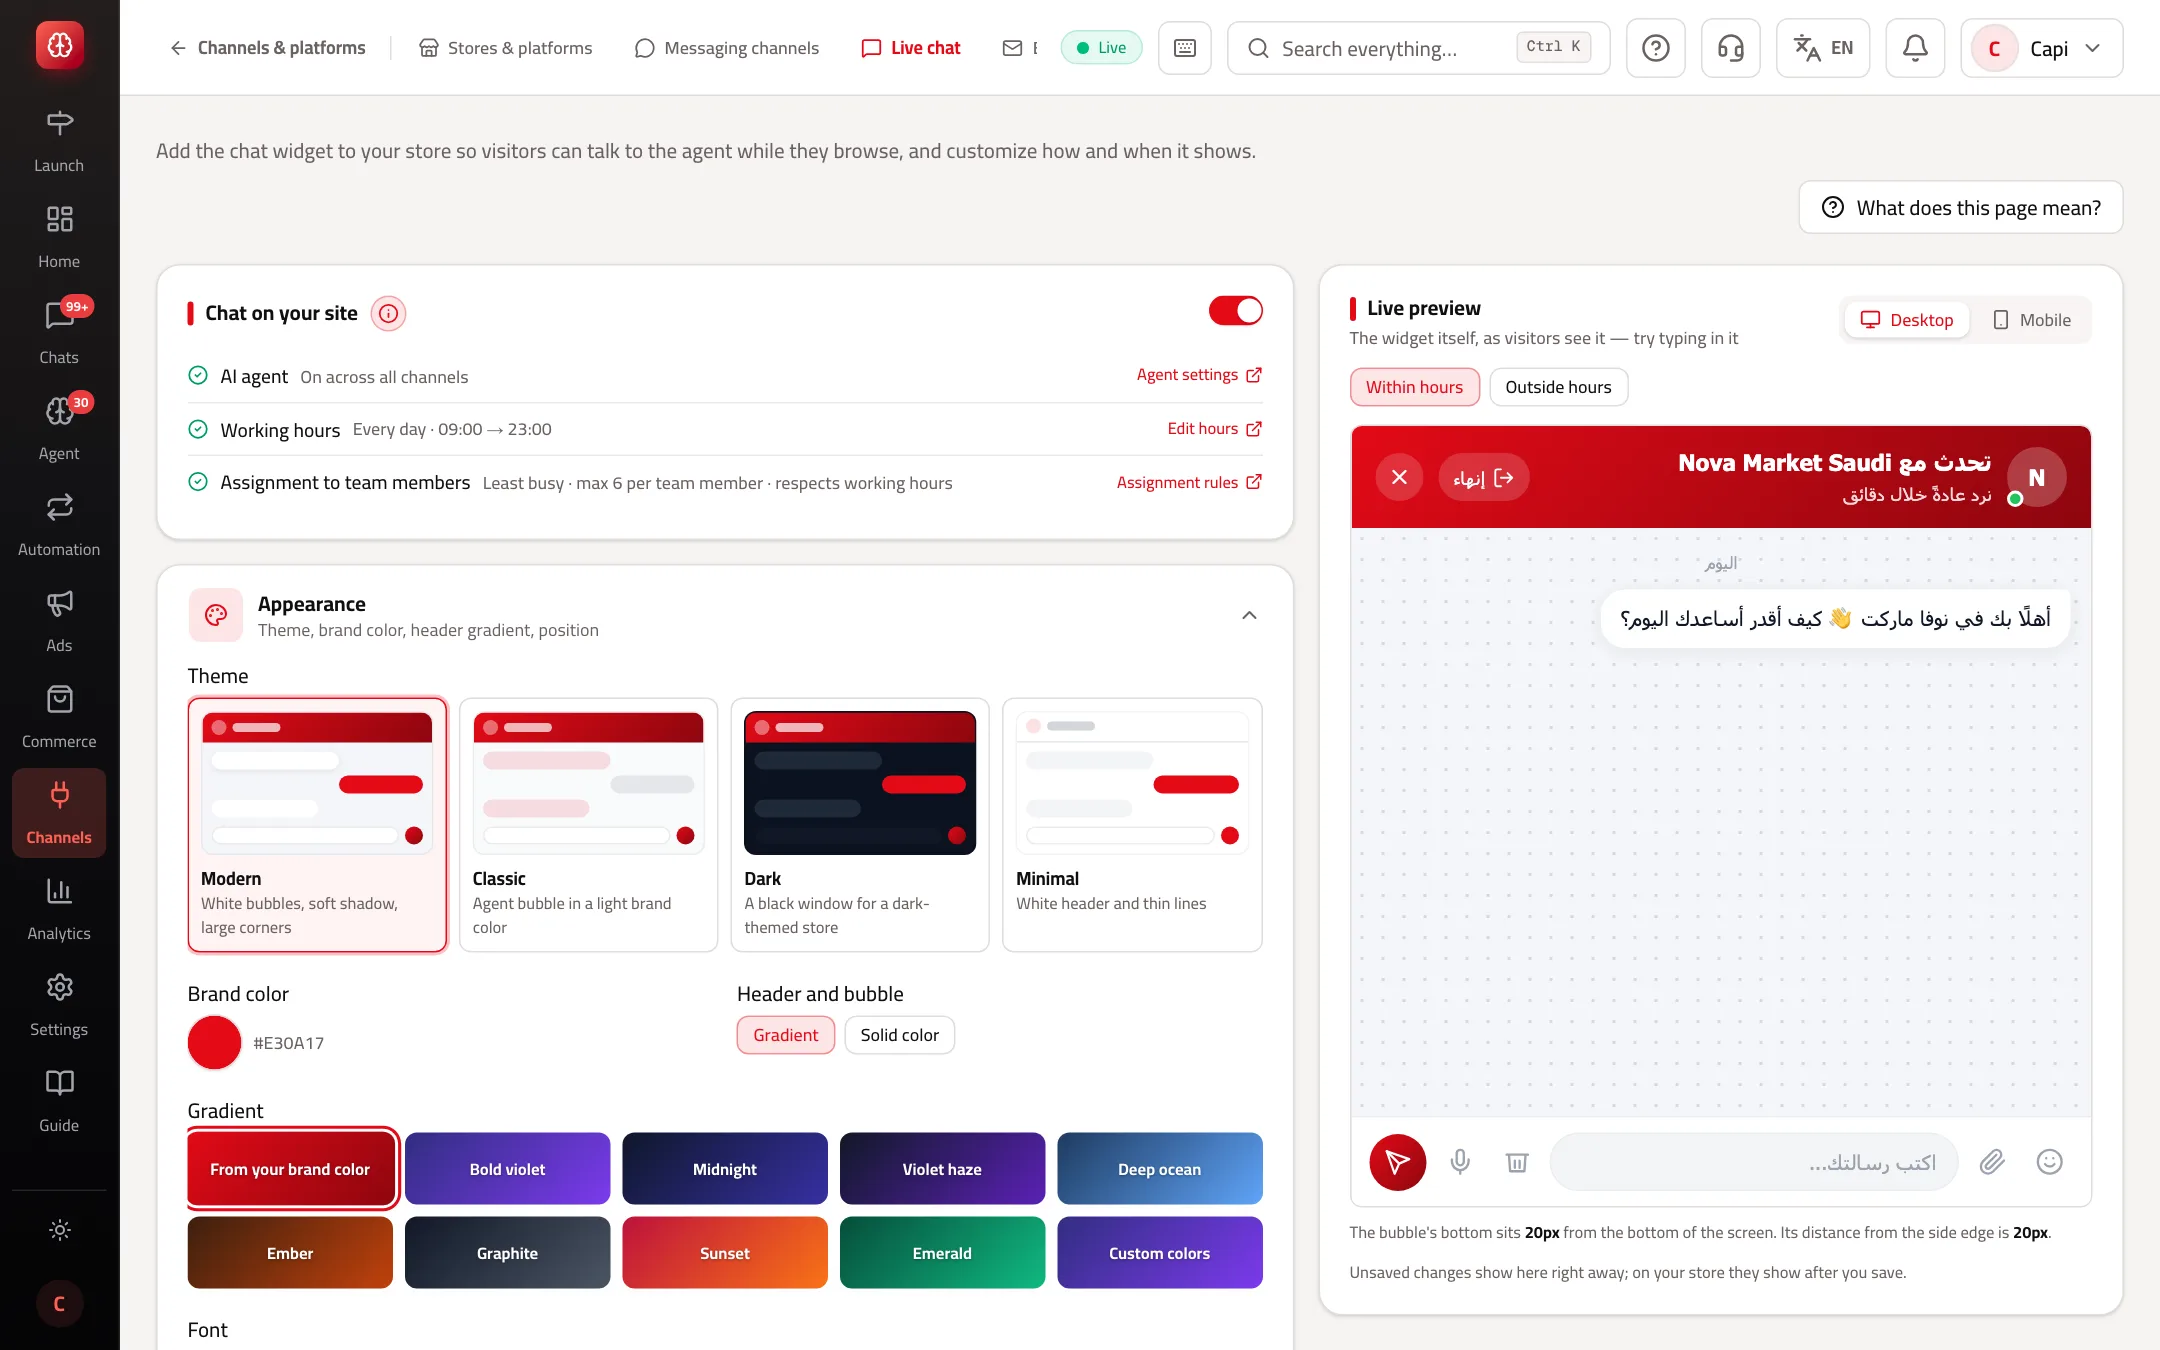
- 1The “Chat on your site” switch; under it the agent, working hours and team assignment, each with a link to change it.
- 2The settings sections: appearance, bubble and header, languages and texts, pre-chat form, trust badge, starter questions, sound alert, bot, allowed sites and embed code.
- 3“Live preview”: the chat as a visitor sees it. Try it within and outside hours, on desktop and mobile.
Put chat on your store
- 1
Open “Embed code”
If the section says chat is added automatically on your store, there's nothing to paste. Otherwise copy the line with “Copy code”.
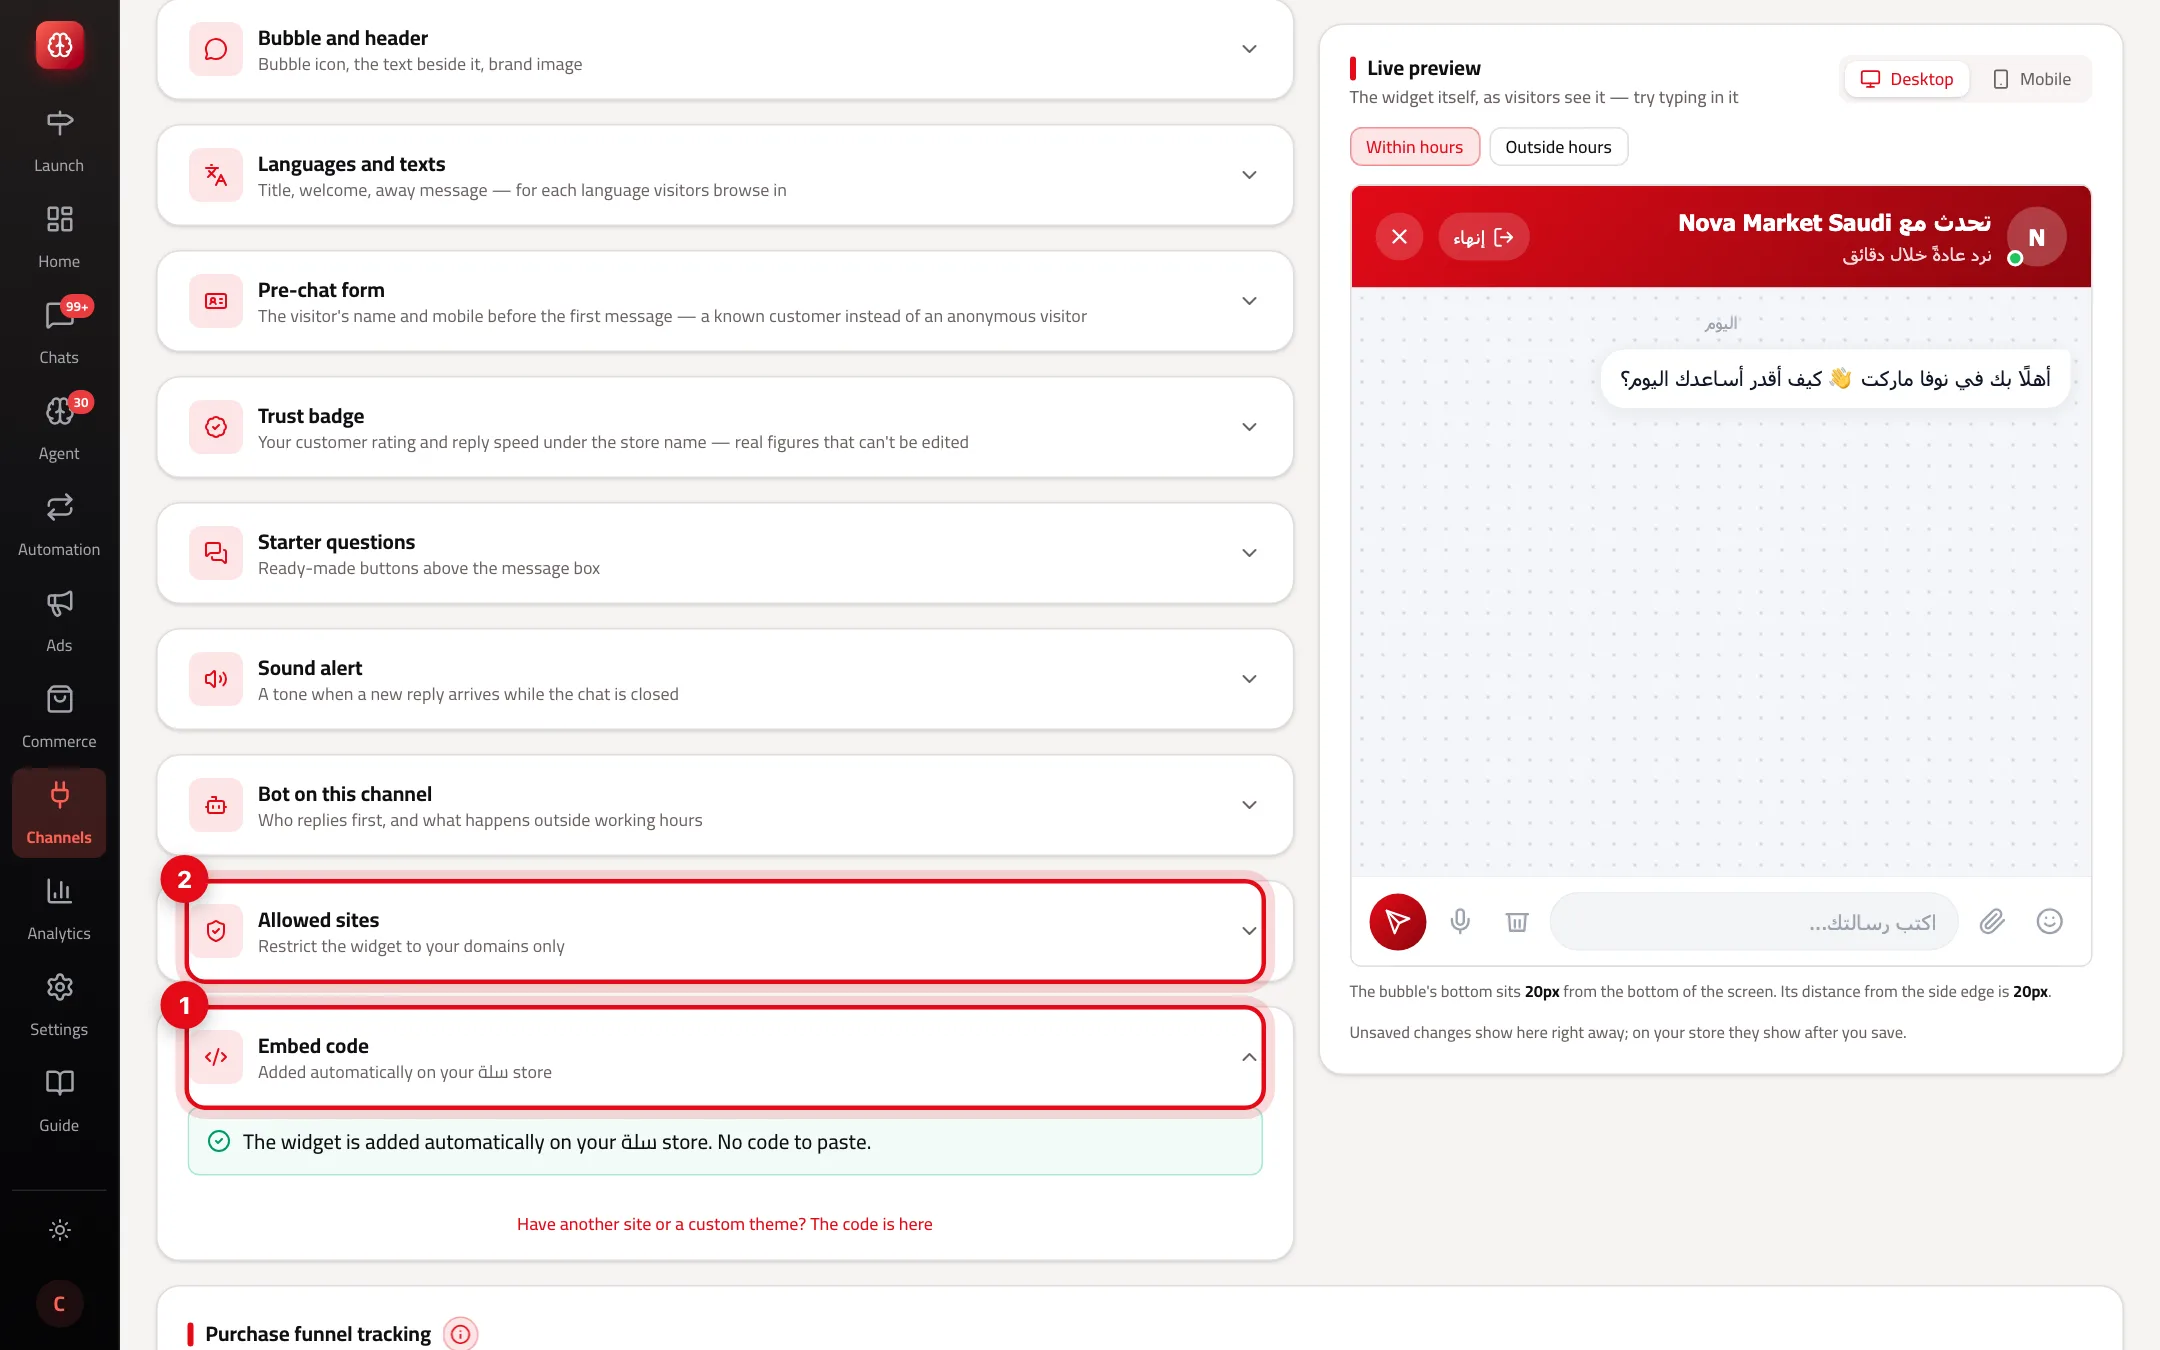
- 1“Embed code”: one line, added once, that picks up every change automatically.
- 2“Allowed sites”: enter your store's domain so chat works only there. Left empty, it works on any site.
- 2
Paste the line on your site
Put it before the </body> tag in your site's theme, or in a “custom code” box if your platform has one. On WordPress the Capi Agent plugin adds it for you.
- 3
Publish the store
On the home page press “Publish now”. Before publishing, chat answers no one.
- 4
How you know it works
Open your store in a private window. The bubble shows in the corner you chose. Type a message and find it in the inbox under the website channel.
Best practices
- Use your brand color under “Appearance”, and write a short welcome that says what the agent can do.
- Add 3 or 4 “Starter questions” from what customers ask most, such as “Where's my order?” and “How long is delivery?”.
- Turn on the “Pre-chat form” if you want the visitor's number before they start — it makes them reachable for campaigns.
- Enter your store's domain under “Allowed sites” so nobody puts your chat on another site.
Common mistakes and how to fix them
ProblemThe bubble doesn't show on my store.
FixCheck all three: the switch is on, the store is published, the code is on the page. Then make sure your store's domain is under “Allowed sites” if that list isn't empty.
ProblemI changed the color and the store didn't change.
FixSave the change — the preview shows edits before saving, the store after. Then reload the store page.
ProblemChat shows but nobody replies.
FixThe store isn't published, or the bot is off under “Bot on this channel” outside working hours with no one on the team available.
Screenshot from a demo store
Parts of the page
- 1
Appearance
Theme, colours, font and background. The preview beside it is the window itself, as your visitor sees it.
ExampleChoose “From your brand colour” so the window's header takes your store's colour. - 2
The bubble
The button that opens the chat: its position, icon and text beside it.
- 3
Domains
The website addresses where the chat may appear. It won't show on a site that isn't added.
ExampleAdd both “mystore.com” and “www.mystore.com” if your store opens on both. - 4
Embed code
A line you paste into your site if your platform doesn't add the chat on its own.
Related articles
Didn't find your answer?