Channels & platforms
Email: an address for your campaigns, and one your customers write to.
Open the page in the dashboardHow email works in Capi
Each store has two separate mailboxes, each with its own domain and reputation: “Marketing email” sends campaigns and abandoned-cart emails, and “Customer service email” is where customers write — each email opens a conversation in the inbox.
The split protects you: a complaint about a campaign never touches your support mailbox. That's why the same domain isn't accepted for both; use a subdomain for each, such as news.mystore.com and help.mystore.com.
Setup is three steps per mailbox: the address, then DNS records at your domain provider, then verification.
Read the page
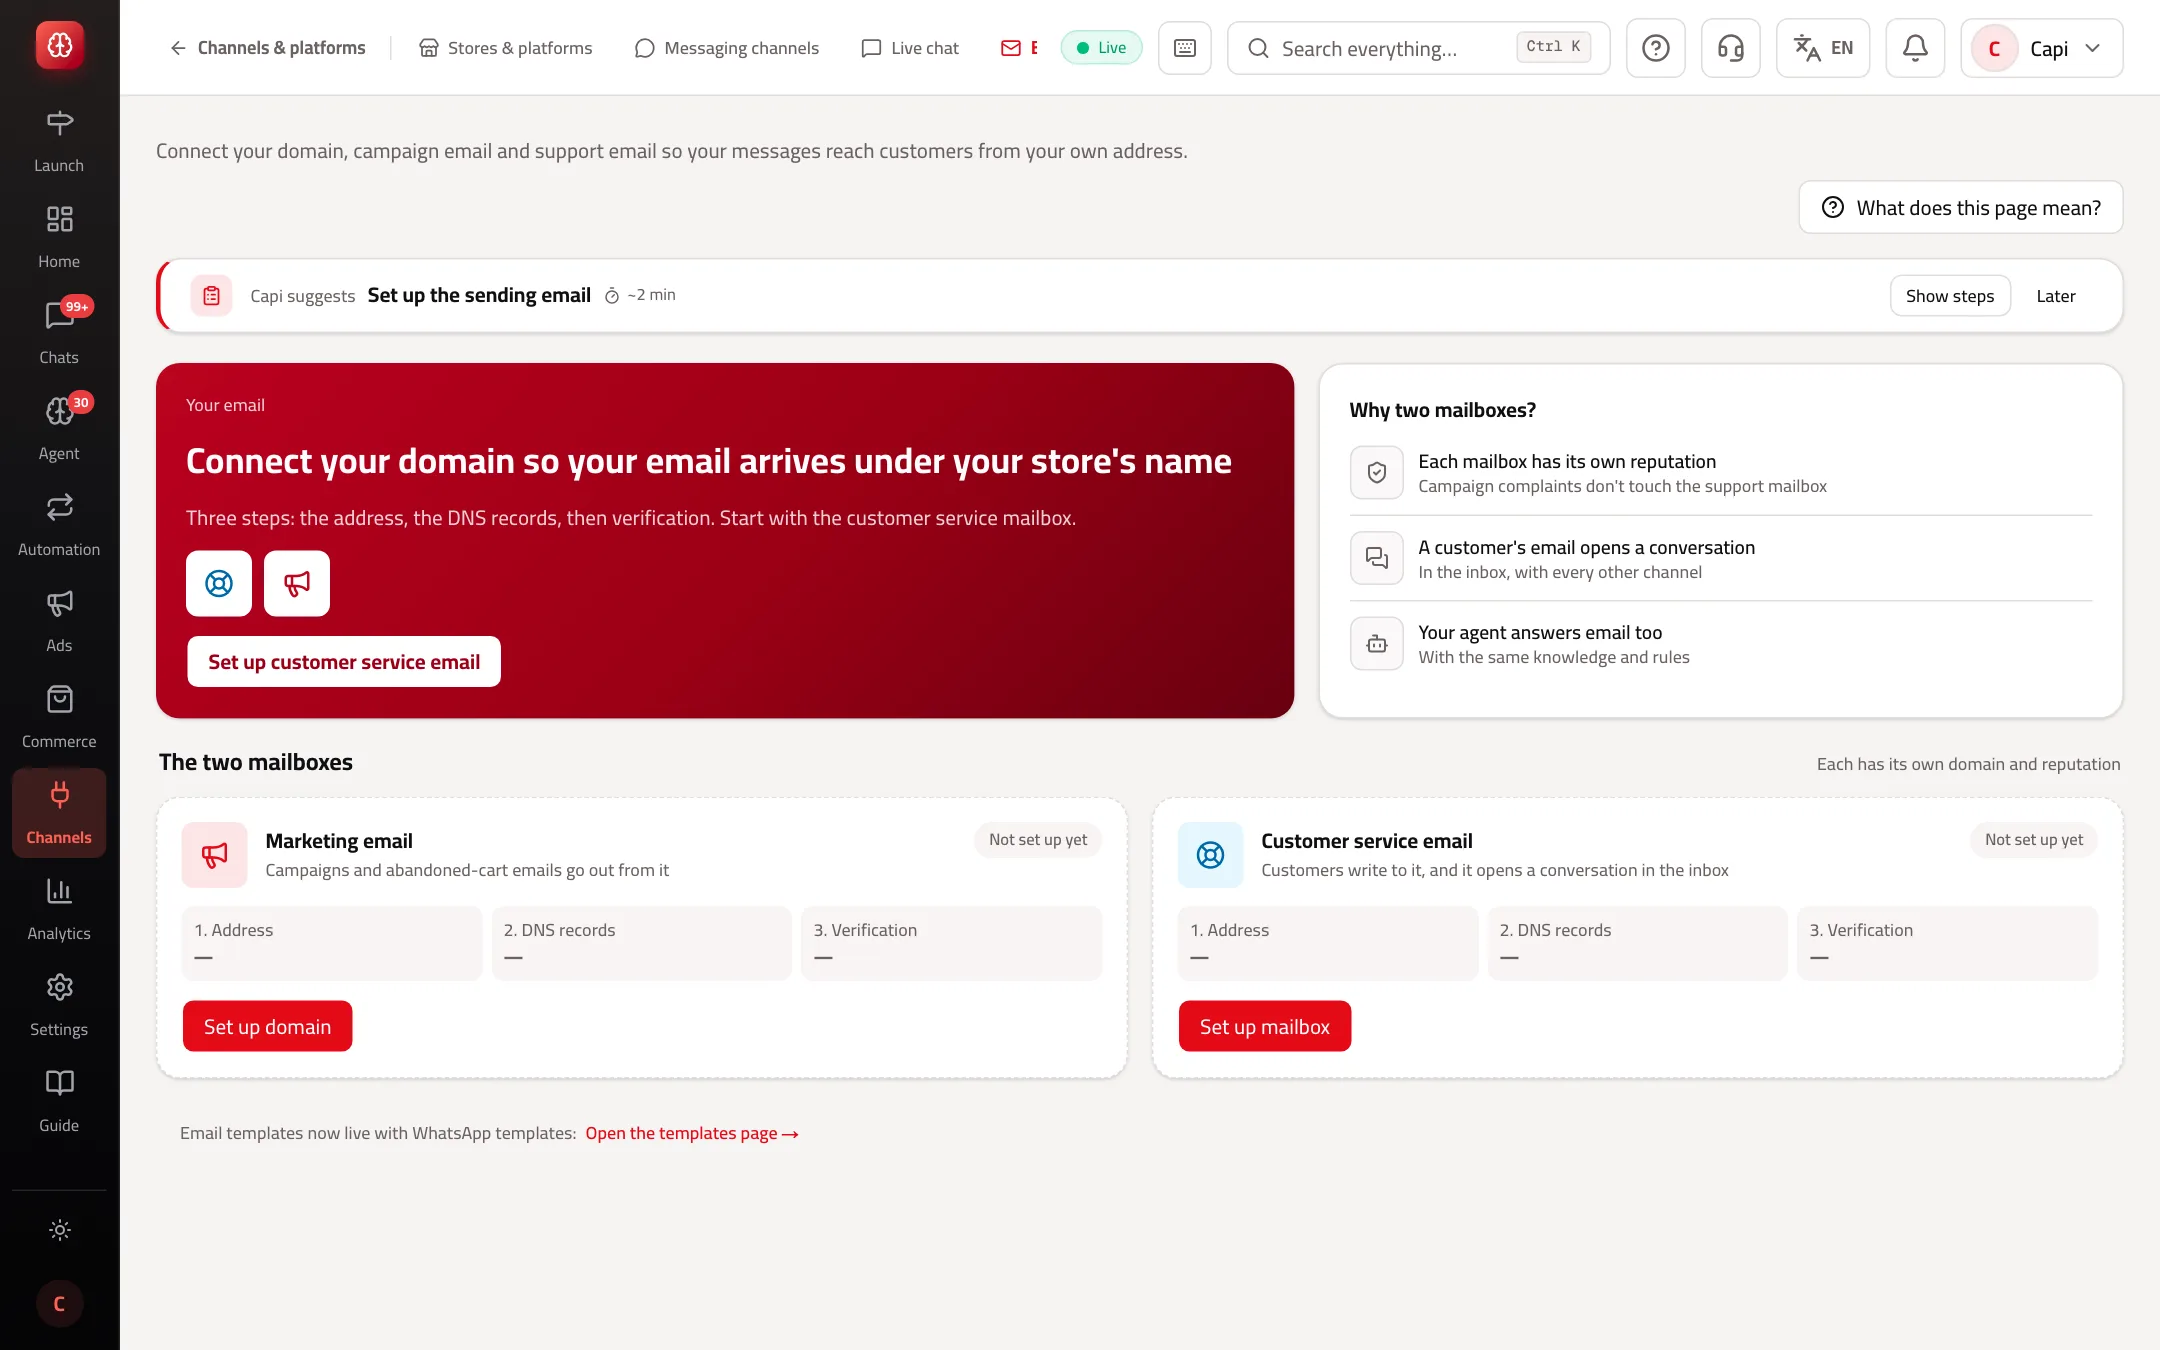
- 1“Marketing email”: its status, its three steps, and “Set up domain”.
- 2“Customer service email”: its status, its three steps, and “Set up mailbox”.
Mailbox statuses
| Status | What it means | What to do |
|---|---|---|
| Not set up yet | No address saved | Press “Set up mailbox” or “Set up domain” |
| Waiting for DNS records | The address is saved; the records aren't added or haven't spread yet | Add the records and press “I added them — check now” |
| Saved, waiting on us | Sending isn't enabled on the platform yet | Nothing on your side; contact support if it lasts |
| Needs registering again | The email provider no longer knows the domain | Register it again from the same window |
| Verified | The mailbox is ready | — |
Set up the customer service mailbox
- 1
Type the address
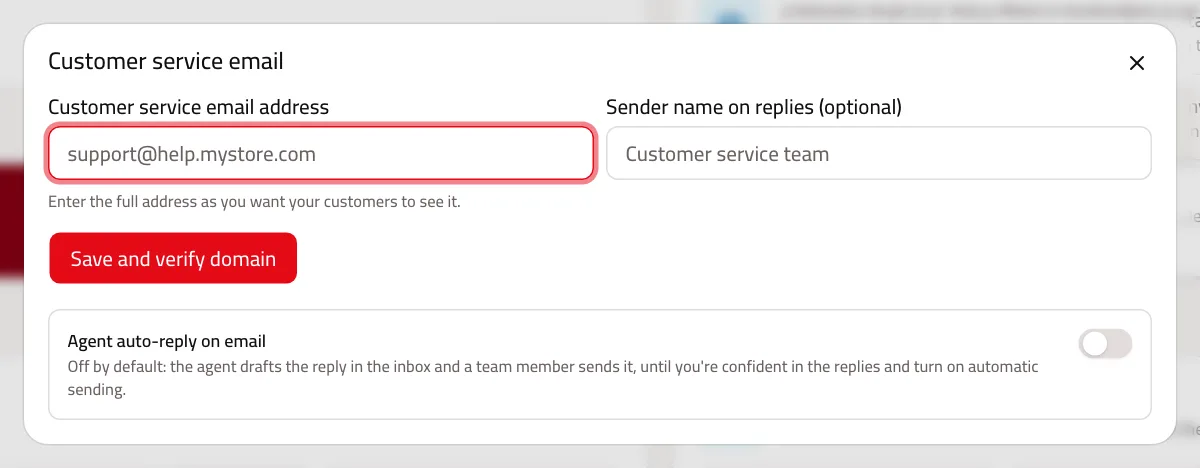
Press “Set up mailbox” and type the address, such as support@help.mystore.com. If you type your main domain, Capi suggests a subdomain; press “OK, switch it”. The sender name is optional.
- 2
Save
Press “Save and verify domain”. The table “Add these records at your domain provider” appears.
- 3
Add the records at your domain provider
Pick your provider from the list (Hostinger, Cloudflare, GoDaddy, Namecheap and more) to see its menu path and a link to open it. Copy each record (type, name, value) and add it there. The MX record routes this domain's mail to Capi; SPF and DKIM prove the emails are from you.
- 4
Verify
Press “I added them — check now”. Changes can take up to an hour to show; press “Check again” later.
- 5
How you know it worked
The status turns “Verified”. You can then turn on “Agent auto-reply on email” (off by default).
Set up the marketing mailbox
- 1
Type the address and sender name
Press “Set up domain”, type an address on a different domain from the support mailbox, such as offers@news.mystore.com, and the sender name customers see.
- 2
Save and add the records
Press “Save and verify domain” and add the records the same way. The marketing mailbox needs no MX record.
- 3
Verify
Press “I added them — check now” until the status is “Verified”. Until then any marketing email returns a clear error instead of sending.
Best practices
- Start with the customer service mailbox — it opens real conversations with your customers.
- Use a subdomain you don't use for any other mail. The MX record routes the whole domain's mail to Capi.
- Email templates live on the “Templates” page with the WhatsApp templates; this page only sets up the sender.
Common mistakes and how to fix them
ProblemI put the MX record on my main domain and my normal email stopped.
FixAn MX record routes that whole domain's mail. Use a subdomain just for customer service and remove the record from the main domain.
ProblemThe check says records are missing, but I added them.
FixWait up to an hour, then “Check again”. Make sure the name was copied exactly — some providers add the domain to the end of the name by themselves.
ProblemThe same domain isn't accepted for both.
FixThat's on purpose, to protect each mailbox's reputation. Use two different subdomains.
Screenshot from a demo store
Parts of the page
- 1
Two separate mailboxes
The marketing mailbox sends campaigns; the customer-service mailbox receives customers' emails, which you answer from the inbox. Separate because sending reputation sticks to the domain.
Examplenews@mystore.com for campaigns, support@mystore.com for customers. - 2
DNS records
Records you add at your domain provider to prove the domain is yours, then press “Check now”. Sending starts once it's verified.
Related articles
Didn't find your answer?